


Nodejs is a backend technology of JavaScript. It handles all the server-side scripting of the web applications and thus to manage the complexity of code of such applications is very important, for which MVC is used.
MVC is an abbreviation of Model View ControIler. It is an architecture, that divides the code into three main components Model, View, and Controller. Each of these components is built to handle specific development aspects of an application. It helps in working with different development aspects independently and controls the working flow of the application, and its reusability. These are folders actually which stores the related files.
Model :
Model is related to database, the database we use in an application is stored in Model. The structure of the collection, its relationship, constraints, all sort of database aspects we need for our application is stored in the Model folder.
View :
View folder stores the web pages which are shown on the browser. It consists of the UI logic and design of the application. This view folder collects the data from the Model and renders the page on user request.
Controller :
The Controller controls the logic of the application, it is an interface between Model and View. Model interacts with View through Controller, thus building communication between them, serves the logic for user requests, gets the data from the Model, and renders the page from the View as in response.
MVC design patterns reduce the reusability of code, allow changes to the files without affecting the others, and easy to maintain the flow of the application.
Creating Nodejs MVC application
We are going to create simple Student registration. It is going to take student details, store them in the database, and register a student successfully.
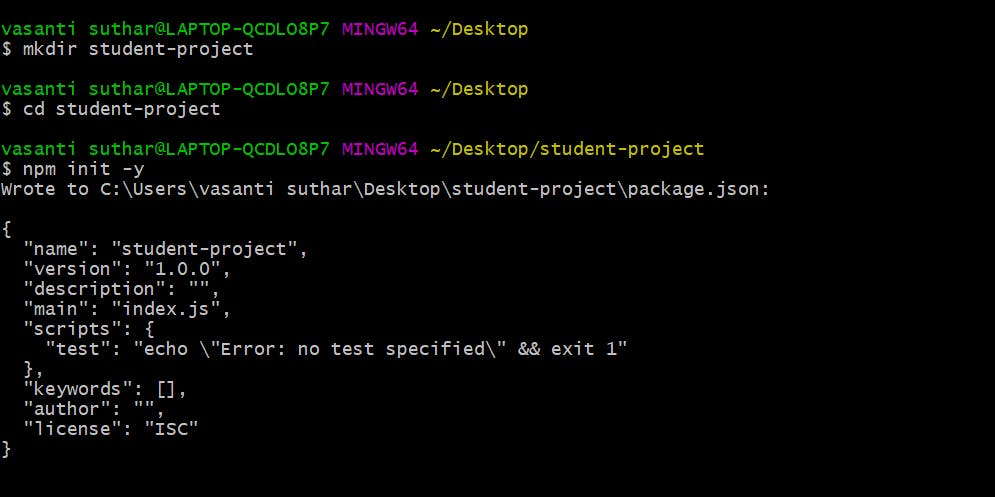
Go to the terminal to create a student project folder
mkdir student-project
cd student-project
First of all, we need to create a package.json file in our project folder which will contain all dependencies and scripts needed for running the application. This is done by the npm init command.
npm init -y
Creating project folder structure
We need to create a project folder structure as given below
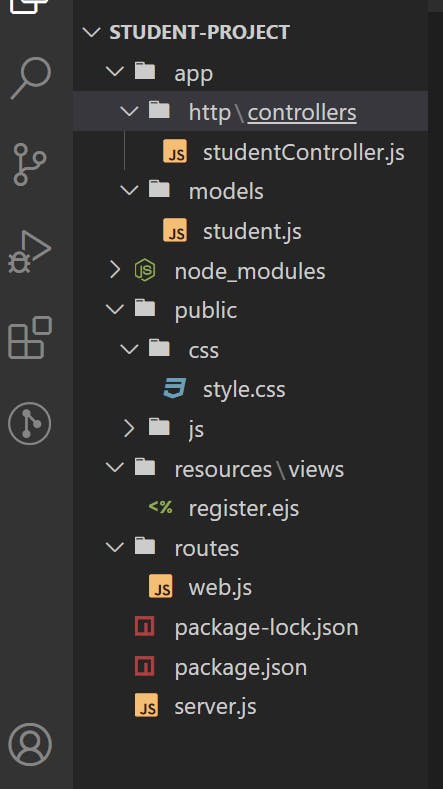
As shown we have various folders in our project let's discuss all,
app/http/controllers:
this folder will include controller files, here we have created a studentController.js file for students.
app/models:
this folder includes database collection, student.js defines the structure of the student collection in our student database.
public:
this folder will serve the styling of the application. CSS folder includes styles.css file and js folder includes JavaScript app.js file.
resources/views:
The view folder includes ejs files which are HTML pages presented to the user. Register.ejs is registration page for students.
routes/web.js:
File for routing, connecting the controller and views.
We need to install express.js for routing and mongoose for the database in the application. Go to terminal cd to student-project and type npm i express mongoose, after installing, the node will create node_modules folder.
Setting up the server.js file
The server.js file servers the requirement of all the modules that are needed for application, setting database connection, express.js assets, and defining the port to start.
const express = require('express');
const mongoose = require('mongoose');
const app = express();


//database connection
mongoose.connect('mongodb://localhost:27017/StudentDB')
const connection = mongoose.connection;
connection.once('open',() => {
    console.log("database connected");
})

//assets
app.use(express.static('public'))
app.use(express.urlencoded({extended: true}))


//set template engine
app.set('views',path.join(__dirname + '/resources/views'))
app.set('view engine','ejs')

require('./routes/web')(app);

app.listen(3000, () => {
    console.log("server started at port 3000");
})
The application starts with a server.js file where all modules are imported and the mongoose database is connected. This file sets up the server to listen at port 3000, the application will be running at localhost:3000. EJS template view engine is set to view the views folder to render the pages on the browser. Here the database name is given as StudentDB. Routes/web.js file is imported and the app which handles the functionalities of the express is passed to the function in the web.js file.
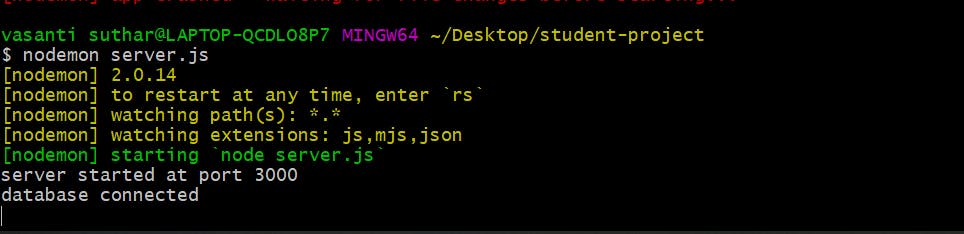
Now in terminal cd to the project folder and type nodemon server.js. The server is started at port 3000 and the database is also connected.
Setting models/student.js file
Let's create a student collection where it will store student information. This is a model section of our application.
Student.js file is a collection file in the StudentDB database called 'student'. In this file we are going to create the student schema, defining the fields in student collection which are required.
const mongoose = require('mongoose');
const Schema = mongoose.Schema

const studentSchema = new Schema({
    name:{type : String, required: true},
    email: {type:String, required: true},
    password : {type:String, required:true},
 },{timestamps:true});

module.exports = mongoose.model("Student", studentSchema);
Here, the mongoose is required to create mongoose schema, studentSchema is created with fields name, email, and password with validation. The collection is then exported and this file will be imported to the controller file to access the Student collection.
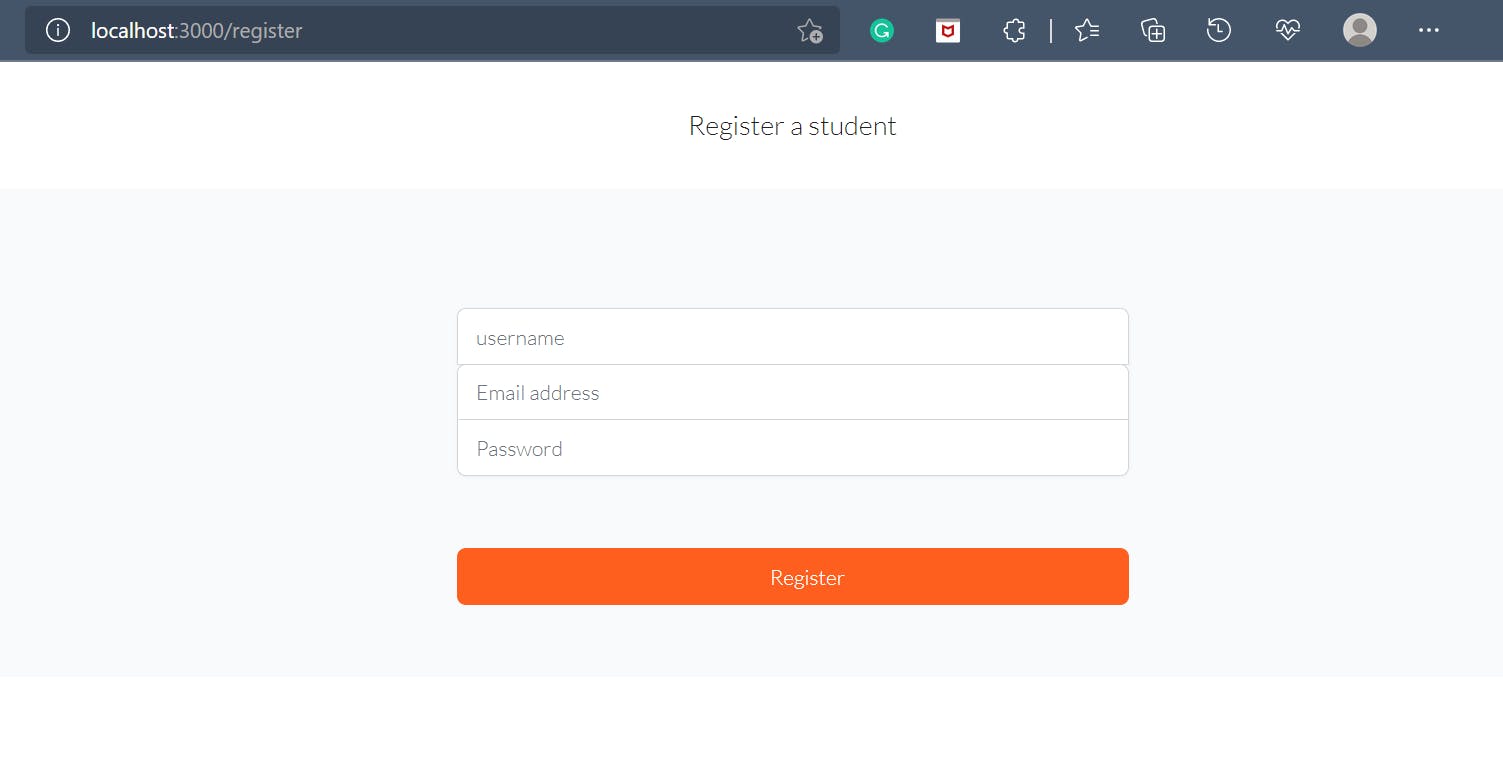
Creating resources/views/register.ejs file
Register.ejs file is HTML file in the views folder to display the register page for a student. This page takes input from students for details for registration.
<!DOCTYPE html>
<html lang="en">
  <head>
    <meta charset="utf-8">
    <meta name="viewport" content="width=device-width, initial-scale=1">
       <title>Student</title>
    <!-- css style -->
    <link rel="stylesheet" href="/css/app.css">
</head>

<body>
   <div class="register-page">
      <h1 class="heading">Register a student</h1>
         <form action = "register" method="post">
        <div class="main-register">
            <input type="text" name= "name" placeholder="username">
            <input type="text" name="email"  placeholder="Email address">
            <input type="password" name="password"  placeholder="Password">
            <button type="submit">Register</button>
            </div>
         </form>
  </div>
</body>
</html>
The form will make a POST request and the value of the name attribute of the input tag will be passed to the register the route defined in the web.js file.
App/http/controllers/studentController.js file
Controller files build communication between model and view. The file gets the data from the model and puts it in view files and displays them on the browser. It handles the request from a user, implements the logic, and gives the response. StudentController.js file handles the response and request for the registration of a student.
const Student = require('../../models/student');

function studentController(){
    return{
        register(req, res){
            res.render('register');
        }
     }
}
module.exports= studentController;
The student model is imported to get the data from student collection and the function studentController is created for implementing the logic to render the pages. Register page will be rendered as in response to localhost:3000/register route to the user. The function is exported which will be imported to the web.js file.
Creating routes/web.js file
Web.js file is created to handle the HTTP requests. This file will import the studentController.js file as in to call the method defined to register a student to a specific route.
const studentController = require('../app/http/controllers/studentController');

function initRoutes(app){
    app.get('/register', studentController().register);
}

module.exports = initRoutes;
Here, on HTTP GET request at localhost:3000/register, the register method of studentController function will be called and this will render register.ejs file on the browser.
Making a POST request to register a student
Now to register a student, we need to make a POST request that will save the data to student collection. For this, we will create another method that will handle the post request in the studentController.js file.
const Student = require('../../models/student');

function studentController(){
    return{
        register(req, res){
            res.render('register');
        },
        registerStudent(req, res){
            const{name, email, password} = req.body;
            if(!email || !name || !password){
                   return res.redirect('/register');
            }
            const student = new Student({
                name,
                email,
                password
            })

            student.save().then((student) =>{
                console.log("registered successfully")
            }).catch(err => {
                console.log(err);
                return res.redirect('/register')
            });
        }
    }
}

module.exports= studentController;
Here, in the registerStudent method name, email and password are saved in the student collection and if it is not saved successfully then the response is redirected to the 'localhost:3000/register' page.
Web.js file
The registerStudent method will be called to the POST request at the '/register' route(this route is defined in the register.ejs file in the form action).
const studentController = require('../app/http/controllers/studentController');

function initRoutes(app){
    app.get('/register', studentController().register);
    app.post('/register', studentController().registerStudent);
}

module.exports = initRoutes;

After entering details and successful registration of student, the terminal will print 'registered successfully'.
Code flow:
Web.js file looks for the HTTP request at the given route, then it goes to studentController with the given method and implements the logic, gets the data from Model, and renders the pages from View folder.
This way we can create multiple methods in a single controller and also we can create multiple controller.js files for various purposes. The whole code is divided into several applications and working with them becomes very easy. All the above defines Nodejs MVC application.